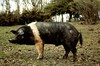
There are a number of reasons people choose to buy farmer raised pork instead of commercially farmed pork, but for me, the most important is the flavor difference. Eating a farmer raised heirloom pork chop makes you wonder what you've been eating all these years. It is much juicier, and "meatier" tasting, really night and day. The image to the right shows both types. Right is farmer, left is Costco.
So, I've been wondering if that difference would be appreciable in a salame. It would only make sense that it would be. In order to test this theory I made a very simple salame keeping everything the same except the meat used. For commercial pork I used pork shoulders from Costco, which generally has good meat. The farmer pork was raised by a local farm here in Georgia.
To really taste the difference between the two porks, I decided to make a super simple salame. I would call this a cacciatorino even though it isn't of the appropriate shape for that name. It is made only of meat, fat, salt, pepper, and garlic infused wine (and starter culture and dextrose). The formula I used is as follows. The quantities are for the farmer salami I made, but using the % you can scale as you need.Ingredient Quantity(g) % of Meat+Fat Pork Shoulder 810 70% Fat(belly) 342 30% Salt 31.2 2.72% Black Pepper 3 0.26% Cure #2 2.8 0.24% Dextrose 5.6 0.5% F-RM-52 Starter 1 0.09% Reduced wine 36 3.13%  This time I used a pork shoulder. This one pictured on the left is the one from a Berkshire pig from a local farmer, below that is the Costco shoulder (and their total mangling of it to remove the bone).As you can see the marbling is much greater than in a commercial shoulder.
As usual, this was trimmed, and cubed, removing as much sinew as possible. I quickly realized that using pieces from the back leg, the ham, is much more efficient. It has less sinew, and the yield is much higher. With this bone in farmer piece my yield of trimmed, ready to grind eat, was low. I only got 45% usable meat. The Costco yielded about 60%.
 I used pork belly again. It is really much more convenient than harvesting fatback from the skin portions I buy at the market. If there are large portions of meat in the belly, I remove them.
 Using the formula above, I mixed my meat and fat cubes, and put them in the freezer for about 1 hour.
 I ground using the 1/4" plate. You can see in the picture that partially freezing the meat and fat will give you nice definition in the chunks of fat and meat. If you don't, there is a chance that the fat will smear, and you won't end up with nice fat globules.
I mixed this on the lowest speed on the Kitchenaid mixer for 1 minute. Added everything except the starter culture. I mixed the meat and spices for about 1.5 minutes. (see finocchietto recipe for reduced wine/garlic info). Then added the starter culture which had been dissolved in 30g of distilled water 10 minutes prior. I mixed for another 30-45 seconds. This is what the meat paste should look like when the mixing is done. A good bind has been achieved. You can see the white film on the sides of the bowl which is the myosin protein which has been pulled out of the meat by the salt (correct me if I'm wrong, chemists!)
 The salami were stuffed into 4 43mm casings and 1 60mm casing. All the farmer pork fit into 2 43mm casings.
They were fermented at 83 deg. F for 26 hours for the 43mm, and 28 hours for the 60mm.
They were then put into the curing chamber held at 54 deg.F and 70% RH.
I'm trying a little higher RH than I have in the past to try to slow down the drying to develop more flavor.
The Kichenaid mixer is great for mixing small quantities for salame paste, pretty much what I made with the finocchietto, that is about 1 KG of meat/fat is the max it can handle. If you have more, as I did when making the Costco pork salame, you'll need to grind into a large bowl, and mix everything with a cutting and folding motion with your hands or a spatula. I'm demonstrating this in the movie below.
Looking forward to tasting these head to head. I'll report on them as soon as I can as usual!
Friday, September 21, 2007
Farmer pork Vs. Commercial pork - Cacciatorino

Friday, September 7, 2007
A purchase-able fermentation box? It should work!
 The Thermokool MR-138. Happened to find this while reading something else. People have used this for proofing bread dough, and it seems like it is very accurate and settable to temperatures needed for fermenting salamis. It claims to be able to go from 40-140 deg. F. It goes for about $90 + shipping, so it is more expensive, but all the work is done for you. Might be worth a try.
Humidity control shouldn't be a problem as long as it is well sealed (it should be). You want the humidity high when fermenting (80-90%). If it is too low, spraying some water with a spray bottle or putting a small bowl in the bottom should work. You can find it HERE.
Wednesday, September 5, 2007
Salame al Finocchietto - Wow that was quick!
 It's only been 10 days since I put this salame in the curing chamber, but it's ready! I kept the chamber at 56 deg. F and a humidity of about 65%.
As of this morning, the weights of the salami have decreased as follows:
Salame A: 566g -> 321g a 43% loss in weight
Salame B: 596g -> 359g a 40% loss in weight.
So I took salame A, the one which had lost more weight, out of the curing chamber. As you can see there is no mold formation on the outside of my salame. I've never been able to figure this out. I have no idea why. I've even tried spraying the salame with distilled water in which I've mixed a moldy casing from a commercial salame...nothing! I must have a magical chamber which doesn't allow growth.
Anyhow, the aroma is very light, I can smell the fennel, and the black pepper, but not really strong. Cut into it:

You can see the medium fine grain, the nice distinct fat chunks and the black pepper and fennel seeds.
Flavor is very good. Very mild acidity, which is what I was going for, nice fennel flavor, but the black pepper is maybe just a touch too strong. I'd reduce it about 20% next time. Texture was good. A bit drier around the edges than in the middle, but this may change as it firms up after a few days in the fridge. I've found that a week or so in the fridge (sealed in a zip lock bag) allows the meat humidity to equalize across the diameter and the flavor seems to increase.
Overall I'm pleased. Simple flavors, good salame.
Monday, August 27, 2007
Salame al Finocchietto

Salame al finochietto translates to "salame with wild fennel seeds", which is exactly what I made last week. I was actually able to make this during the week by doing one or two steps every evening after work.
I wanted to make a simple salame to get back into the hang of things. This one is about as simple as it gets.
The meat and fat I used were not the usual parts of the pig. Normally I'd use pork shoulder, and fat back. This time I used ham meat and pork belly. It was really nice not to have to do much trimming of sinew from the shoulder, these were basically clean hunks of meat. Very convenient. The belly I used was only slightly meaty, as you'll see in the pictures. It is probably much easier for people get get pork belly, than fat back (unsalted), so let's see how it works out.
Unfortunately, because of the whole curing issue, I will not have a report on the flavors, texture and aromas for about 3-4 weeks. The picture above is of the salame before drying. So for now I'll give you the recipe and procedure I used.
One important note is that everything that touches the meat (grinder, stuffer, bowls, counters, hands etc.) should be very very clean. Remember you're not cooking this meat, and you're holding it at temperatures which would allow bacterial multiplication.
Salame al Finocchietto
900g ham meat
380g fatty pork belly
35g salt
6.5g fennel seed - crushed in mortar and pestle
6.5g dextrose
3.1g cure #2
3.5g coarsely ground black pepper
35g reduced wine (see below)
1g (about 1/4 tsp) F-RM-52 starter culture mixed in 30g distilled water with a pinch of dextrose These are the nice pieces of pork ham meat. You can see they are rather lean, and free of connective tissue. Less trimming and waste for us!
 The meat is cubed into approximately 1/2-3/4" cubes.
 Here is our nice pork ham cubed up and ready for the grinder right after we add.......
 The pork belly! You can see this belly is quite fatty. In fact, the leaner part on the right side of the picture attached to the lower portion, I removed and saved to braise. I used the fattiest portions of the pieces I had. Be sure not to use the pork skin!
 Again, I cut them into about 1/2-3/4" batons or cubes.
 I combined and mixed the meat and belly and spread on a cookie sheet and put it in the freezer for 1-2 hours to get really cold, almost frozen. The surface should be a little "crunchy" from being frozen. You don't want it frozen solid or you won't be able to grind it.
 I ground the meat using the 1/4" plate on the Kitchenaid grinder, and let it drop into the Kitchenaid bowl, then put it back in the freezer to chill again. (Don't leave it in there for longer than 1 hour or so)
 In the mean time, I boiled 2 cloves of lightly smashed garlic in 1 cup of wine for about 10 minutes. It reduced to about 3/4 of a cup. I do this because when I used straight wine, without reducing, I could taste the alcohol in the salame. Boiling it evaporates the alcohol but retains the flavors of the wine.
During this time, I added the starter culture to 30-40g of room temperature distilled water in which I dissolved a pinch of dextrose. This is to wake those little buggers up!
I added everything to the ground meat except the starter culture, and using the paddle attachment (you could use your hands) I mixed the mixture. I paddled for 1 minute. I then added the starter culture/distilled water, and paddled for another 30-45 seconds to get a good bind. The meat paste should become tacky, but don't paddle so much that the meat and fat start smearing. You really want the fat globules to stay distinct. Of course I forgot to take a picture of the meat paste before stuffing. Next time. For stuffing I used 43mm collagen rounds. This is an artificial casing which is soaked in warm water for about 15-20 minutes to soften. Stuff them until they are nicely full, but not super packed or they may burst. Try to stuff them with as few air pockets as possible. Tie them off into loops, and using a CLEAN toothpick poke the casing all over, trying to target any air pockets you may have.
 From this batch I got almost exactly 2 full 43mm casings, one weighing 566g and one 596g. I had a little left over.
I matured them in my incubation chamber at 82 deg. F for 25 hours. This is based on experience. You might want to measure the meat past pH using pH papers.
This is what they look like after incubation. They are just a little more red, and have become a little "tighter" or "stiffer".
Now they get put into the curing chamber until they've lost about 30-40% of their weight. Which is why it is important that you measure the before-cure weight. This should take about 3-4 weeks.
As soon as I taste them I'll report on the taste as soon as I can!
Any questions or comments? Just ask away..let me know if you want even more detail or anything else.
Thursday, August 23, 2007
Love Controls temperature switch
Yesterday I posted about using a Love Controls temperature switch to regulate the temperature of my incubation box. A comment was posted that the same control could be used to control the curing chamber, as long as it allowed heating and cooling control.
To be sure, i checked the instruction sheet, and this controller CAN be used for both heating and cooling, so this controller can be used instead of the Johnson Controls one, which is only for cooling. It is actually a little cheaper too at $50 + $10 or so for a thermocouple, but it will require you to do some wiring, and doesn't come in a nice neat box.
Thanks for mentioning this option.
Wednesday, August 22, 2007
Key equipment piece #4: The fermentation box
Well, maybe not really a "key equipment piece", but an important one nonetheless for making salame.
When making salame, a bacterial culture is added to the meat to inoculate it with a beneficial flora, rather than relying on random colonization and hoping for the best. This gives the salame flavor as well as protection against harmful bacteria. To assure that the bacteria added rapidly multiples, the salame has to be held at a certain temperature and high humidity before being dried, this is called the "fermentation" or "maturation" stage. The temperature is dependent on the bacteria added, and its optimal growth temperature. Various cultures can be found on butcher-packer's page, and they also have instructions for use there. So, anyhow, the salame needs to be kept at a certain temperature and high humidity. In order to do this, I bought a large plastic storage container, added some hooks to the lid from which I can hang the salame, a light bulb for heat, and a small computer fan on some perforated pegboard to circulate the warm air.
To the left you can see my plastic box, and the lightbulb. I lined the corner of the box with foil to reflect the heat from the bulb.  Right below that picture you can see the pegboard with the fan in place.
The last important part of this box is something to control the temperature. If the light were to stay on the whole time it would get too hot, ruining our meat. I bought a thermocouple temperature switch which has a built in line voltage controller from Love Controls. This controller is set for the target temperature, and it turns the bulb on and off. It is about $50 for a controller plus a little more for the thermocouple, but I bet a cheaper one could be found on Ebay.
Having said all that, this isn't really necessary. This can be done by putting the salami in a tupperware, and then in an oven with just the light bulb and leaving the door a little open. You'll need a thermometer and keep track of the temperature for a while at the start, but once you figure out what works for you and your oven, you should be fine.
Pretty much you want to put the salame somewhere where it can stay at a relatively steady temperature of about 70-85 deg. F (exact numbers depend on the bacteria you're using, and desired speed of fermentation), and be in a high humidity environment so it doesn't dry out. I'm sure you can figure out a simpler way to do it than what I did...I just set it up like this to be able to specify an exact temperature and have it be repeatable every time. The temperature of your fermentation and how long you leave it will have a profound effect on the final flavor.
The amount of time you ferment is dependent on your temperature, you must get the pH of the meat paste below 5.1 within 36-48 hours. Most of the time I ferment for 24 hours. I urge you to read "Charcuterie" or "Cooking by Hand", as they can explain the process and timing much more clearly than I can, and I don't want to be held responsible for improperly cured salame getting someone sick. Look in my books list for these two books, they're books you should own anyhow, if you're into curing or sausages.
Saturday, August 18, 2007
Sometimes it's better to be safe than sorry
Today I decided I'd throw together a quick simple salame tomorrow to get back into the swing of things. So off I went to my local chain grocery to get a pork shoulder. They had no pork shoulders.
What they did have was pork picnics. A picnic is the bottom portion of the pig's front legs. It is the part below the shoulder. I figured this would be perfectly fine, which in theory it is. So I picked one up. This is where things started to go downhill.
Upon opening the cryovac bag, a strong sulfur "aroma" hit me. Sometimes pork in cryovac bags can have a bit of smell to it, so I didn't worry too much about it, but more on that later. I then started dissecting it, and that is really where things got ugly.
FOR THE LOVE OF GOD, NEVER USE A PICNIC TO MAKE SAUSAGES OR SALAME!! The picnic (and I should have known this) is made up of dozens of really small muscles connected with connective tissue and fat strata. This is a real problem since meat for salame has to be nice chunks of muscle with as little fat or connective tissue as possible to allow for a clean grind. Getting any sort of nice clean chunks of meat out of the picnic is really a big pain. I will not make this mistake again, i'll stick to shoulder/butt or ham chunks.
So after having spent about 45 minutes trimming chunks of meat, the sulfur smell still had not gone away, and I started to get a bit worried. I took a small piece of the meat and cooked it up in a pan and ate it. It was kind of like eating pork steak with some egg...odd. So at this point, after having spent all that time cutting it, I don't think I'm going to use it for the salame. It may be fine to cook, I'm not sure, but I don't think I want to risk using it for something that doesn't get cooked like salame. Maybe the grocery didn't store it cold enough, or mishandled it, I'm not sure. Guess I should have fried up a piece before I had cut it all up and saved myself some time. Better safe than sorry, and I even learned a lesson. Don't use pork picnics for charcuterie.
Tomorrow I might go to a different market and get a couple of thick ham steaks and use those instead.