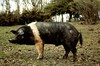
Guanciale is magic. Imagine bacon, only better; porkier, tastier, richer. Guanciale is the cured jowl of the pig. It is cured in similar fashion to pancetta, which is unsmoked cured pork belly, but the location on the animal gives it a very different taste and texture. Since the cheeks/jowls of the pig see a lot of exercise the hunk of pork derived from them is tougher than the belly, and has much more intramuscular fat instead of layering as is seen on the belly.
I used a very simple formula to not hide the quality of this pork which i got from Niman Ranch. Unfortunately this piece of meat is very difficult to find, even in ethnic butchers. You can sub a piece of pork belly and get good results as well.Ingredient Quantity(g) % of Meat+Fat Pork jowls 1257 100% Salt - Kosher 44 3.5% Black pepper crushed 9 0.7% Sugar 22 1.75% Cure #2 3.2 0.25% Thyme (Dry) 1 0.08%  I mixed the cure well, trying to make certain the cure #2 was well dispersed in the sal
 The cure mixture is rubbed onto the jowels, making sure to get into the "nooks and crannies".
The jowls are then put into a ziplock bag, and they'll be turned every few days.
Once cured, they'll be hung to dry for anywhere between 1 and 6 months.
Monday, March 24, 2008
Guanciale
Sunday, March 2, 2008
Coppa V2 - Tasting notes
 Last week I took the plain coppa that was made a few posts ago. I let coppa A, the plain one almost exactly 1 month, at about 52 deg. F and 72% RH. It lost about 35% of its weight through drying. The 2nd coppa, which was a fennel one stayed about 1 week longer in the chamber and lost about 2.3% more water, for a total of 37.3% weight loss.
 You can see in these picture that for whatever reason the mold i sprayed on it did not fully cover the surface like it did for the bresaola.
 On the right is the plain one sliced. It is beautiful. The flavor is fantastic, just perfectly salty, the spices come through (maybe still a tiny bit too much clove!), and it is wonderfully tender and soft without being mushy.
I would say this one is definitely the best coppa I've made. Really really good. The fennel one that was just a touch drier and the flavor was also fantastic. The fennel was very light in the flavoring, and I would probably use a little more next time so it is a little more pronounced.
I don't think i could be more pleased with both of these coppe!
Tuesday, February 19, 2008
Salame Saturday - Slightly updated
Just a quick post to let people know that I added some more information about the fermentation and a picture of the fermented salame to the Salame Saturday post.
Sunday, February 17, 2008
Salame Saturday! - Faceoff: farmer vs. commercial - rematch.
 You may remember a while back, I cured two identical salami, with the only difference being where the pork was purchased from. You may also remember that my results were unclear, but basically led to the conclusion that the flavor was essentially the same. Well, I wasn't satisfied with those results. Based on tasting pork chops, I knew the flavor of a farmer raised pig HAD to be better! I concluded that the quality of farmer pork I had used last time wasn't up to snuff, so I had to retry with pork I knew was good.
With that in mind, I participated in splitting a 1/2 of a Tamworth hog raised by a local farmer. Apart from the complete hackjob on the butchering, the pork is good, at least judging from the pork chop I grilled. So this weekend I decided to rerun my experiment. This time i made an even simpler salame, a Varzi style. I also changed the starter culture to see how it affects flavor. I used F-LC bioprotective culture.
So let's get to it! So far I've only made the salami, and put them into fermentation, so there are no pictures of the meat cured or tasting, there are only a few pictures of ground meat and salami.
As I said above, I made a Varzi style salame. Varzi is a small town south of Milan, and its salame is highly regarded as one of the top salami in Italy. True salame di Varzi has to follow the DOP disciplinary, which is why mine is only a Varzi "style".Ingredient Quantity(g) % of Meat+Fat Pork ham meat 1190 70% Fat (back for farmer belly for commercial) 510 30% Salt 46 2.7% Black Pepper (whole kernel) 1.7 0.1% Cure #2 4.25 0.25% Dextrose 8.5 0.5% Garlic powder 0.5 0.029% F-LC Starter 0.6 0.035% Red wine (Cote du Rhone) 10 0.5%
I'm only going to show "1 side" of the operation. I don't think there is any need to show pictures of both types of meat and fat cubed, and both ground etc. So i'll just show the farmer meat pictures. Also note that for the commercial salame i used the fattiest pork belly i could find, whereas the farmer salame used fatback from the same hog that the meat came from. Here is a picture of the two meats side by side. I used ham slices because it is a lot easier than trimming meat from the shoulder and removing the excess fat and sinew.
Just like on the last comparison you can see that the farmer pork is lighter in color, and seems to have the fat more finely distributed instead of having it in larger globs. As usual, the meat is cubed up into 3/4 inch cubes, and put into the coldest part of the fridge. It's nice using the ham, as the meat is relatively sinew free, and doesn't have much fat in it, which makes adding the exact amount of fat easier than when using shoulder, and makes trimming and cubing much faster.
 The fat is also cubed up and put into the fridge.
 The fat and meat are mixed in cube form and then ground. In this case I used my custom made 11mm Kitchenaid grinder plate. I really liked the size of this plate. The fat and meat are very distinct, and quite large, but not huge. I'm looking forward to trying the salame to see how the mouth feel changes with the grain size.
 I then added all the ingredients and mixed in the Kitchenaid mixer for about 30 seconds, then added the starter dissolved in about 20ml of distilled water, and mixed for another 30 seconds.
For reference, this is the maximum amount of meat I would try to mix in the KA bowl. It may even have been a touch too much...so i'm taking this note in case I forget!:) 1500g is really the maximum salame batch that can be be effectively mixed in the KA mixer bowl.
You can see in the picture of the mixed meat that the myosin in meat has come out and bound the mixture well. A good indicator of this is the whitish film that forms on the sides of the mixing bowl. You can also see that in the video in the Cacciatorino post.
I repeated the process with the commercial pork and pork belly, and then stuffed the salame mixture. I normally use collagen casings, but I bought some natural beef middled, and I figured now would be a good time to try them. I've read that some people think they make the salame taste better than when using collagen casings. In hindsight I should have made some of the salame with natural and some with collagen to see if there is a difference in flavor or mold growth. Oh well, that'll have to be for another post. Casing the salame was quite easy. What WASN'T easy was being able to tie a knot at the end of the salame that would hold the slippery, slimy casing! When I hung them in the fermentation box 3 of them just slipped right out of the knot! There is a special kind of knot called a butterfly knot which is supposed to be used with natural casings, but I've never had the problem with collagen, so I figured it wouldn't really matter. WRONG! If you use natural casings make sure you really tie them tight!
So now the salami are in the fermentation box at 72 deg. F. They've been sprayed with a solution made from 1.5g of M-EK-4 mold culture which was bloomed in 27g of water for 3 hours and then added to 400g of additional water. The salami were sprayed when they were put into the box then 1.5 hours afterwards, and then 15 hours later the next morning. (I really want to make sure i get mold cultures on there!).
About 18 hours after I put the salami into the fermentation box, i could see that the ones closer to the bulb were drier than the ones in the back row, so I rotated them back row to front row. I'm planning on leaving them at 72F for 48 hours, then into the curing chamber.
After about 28 hours I noticed that the humidity in the fermentation box was really really high. I propped open the lid, on the side away from the bulb, about 1" with a book. The next morning, after about 8 hours, I closed the box back up. After 48 hours I took the salami out of the fermentation box and put them into the curing chamber at 55 deg. F and ~70% RH.
You can already see the mold forming on the surface of the salame.
Hope they turn out well, and I hope there is a tasteable difference between farmer and commercial!
Thursday, January 31, 2008
Coppa V0.5 - FAIL!
 FAILURE! Well, you have to imagine it happens! Trying new things, new methods or formulas will inevitable lead to some less than ideal results. Oh well.
A while back, in my 1st coppa post, I cured 2 pieces of meat using different curing methods. One,that worked, was my usual 9-15 day cure in salt and spices, the other was to soak the meat in a brine for 48 hours.
Now, at the time, I thought this was not nearly enough curing time, but I double checked with the gentleman who gave it to me, and he confirmed that it would work, and that he's done it.
Well, I tried. I soaked the meat for 48 hours, rubbed it in chili pepper and put it in the curing chamber. Lo and behold, the meat wasn't cured enough to dry properly. Even after 60 days the center stayed soft, like raw meat. I'm not sure of the chemistry behind it, but I believe this is due to the meat not being fully cured.
So there you have it. Pure, unadulterated FAILURE!
Tuesday, January 29, 2008
More humidification ideas
 I just received an email from another reader, Drew N., about another method for maintaining humidity in the curing chamber.
It would seem that a 50/50 mix of propylene glycol and distilled water will maintain somewhere around 70% RH. I'm told this would be considerably cheaper than using the beads or sheets I mentioned yesterday, since PG is about $8/pint. I'm not sure where you can buy it, but I can't imagine it being that difficult to source. Again, I have no idea how fast or slow this method changes the RH, but it might be worth a try.
PS: It does seem to be FDA approves, and food safe based on the Wikipedia entry.
Monday, January 28, 2008
A few thoughts on humidification
 A few people have emailed me asking about humidity control methods for a chamber, and some even gave me some really good ideas, which I thought I'd pass along. Mind you, i've never tried any of these products.
 A gentleman, John D., emailed me about a humidifier that can be found on Amazon, which has a built in hygrostat. It is an ultrasonic humidifier, which is what we want. I don't know what the control limits are for the hygrostat (what is the max. humidity which can be set?), or how accurate or inaccurate it is. Accuracy isn't critical, as long as it can keep a relative humidity of 65-75%. This might be something worth looking into, at only $43 shipped.
Another fellow emailed me asking about another humidifier/fridge combo, and I thought about looking into "mechanical" means for maintaining humidity. I've already discussed using a tray of wet salt, but there are other chemical that work too. These methods are used in cigar humidors, so i assume they are food safe. These are just chemical beads, which maintain the environment at a 65% or 70% RH by absorbing, or releasing water into the environment.
There seem to be 2 types. Beads and sheets. I've only looked up one brand, which seems to be well regarded in the cigar world, Heartfelt Industries. The sheets are available in 60% and 65% RH varieties. I think the sheets would work better for bigger chambers or fridges.
 The beads come in 60%, 65% and 70%. I think for a full size fridge you would need a few pounds of them. Not very convenient.
I think both these methods would work well for smaller dorm fridge size curing chambers, or wine coolers being used as wine chambers. I have no idea how often one would have to "recharge" the beads or dry them out, so they may not be very useful.
If anyone tries any one of these, the humidifier, sheets or beads, I'd love to hear about it. If you have any other ideas, or any product which may be useful, don't hesitate to email me, so I can post it, it may help other people too.