I’m not sure if this is the actual name of this product, but it’s fits! It’s something I made for a party where I wanted to share my lardo d’Arnad, but didn’t feel like dealing with slicing it.
If you have lardo ready, it’s incredible easy, and incredibly delicious!
Showing posts with label Cured meat : Salame - Recipe. Show all posts
Showing posts with label Cured meat : Salame - Recipe. Show all posts
Tuesday, April 16, 2013
Crema di Lardo
Wednesday, March 30, 2011
La Boccia al Finocchio

Monday, January 10, 2011
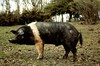
Salam d'la Duja

Piemonte is a region that is close to my heart in that that's where my Italian side of the family is from; my Dad, Nonna, Nonno, and Zii. I like finding cured meats from that area as a way to stay connected to my family. This salume is from the eastern area of Piemonte.
Salam d'la Duja was born out of the necessity to cure meats in an area where the humidity is generally too high, not allowing for proper drying and preservation. Because of the high humidity the salami are dried for just a short while and then buried in liquid lard inside a clay pot, called a Duja. They're kept here for anywhere from 3 months to a year. They stay soft and age in the lard becoming spicier as they age. I've actually never eaten one in Italy, I can't explain why not, so I'll really have no idea how mine compares to the real stuff.
Saturday, January 1, 2011
Salame di Mugnano
 While I was back in Italy this past September I ate all kinds of great cured meats. The variety of different salami available is really mind boggling. I was at a standard grocery store near home, and picked up a couple different ones, including a Salame di Mugnano. One I hadn't had before. It had a fantastic smell, with a hint of smokiness. Upon eating it it was rich, and lightly smoked with just a little hint of heat.
As soon as I got home I started researching this particular salame. It was actually relatively easy finding out about it; a lean, large grain salame that's lightly smoked from Mugnano del Cardinale in Campania. Much harder was actually finding any information on the formula that might be used to make it. So I made up my own. This, I'm sure, is the first of many tries to get this right.
Thursday, December 9, 2010
Salame di Capra - Goat Salame

This is my 1st attempt at a goat salame.
Wednesday, April 8, 2009
Salame di Brianza - Production and Tasting Notes
 Salame di Brianza is a salame produced in the region of Milan, Lecco and Como. It is actually a DOP product which means in order to use the name it has to follow certain strict guidelines and come from a specific area. Clearly mine wouldn't meet the DOP requirements. It's a very simple salame with just salt, pepper, garlic and wine for flavoring. This is by far the biggest cased product I've made. I made it to use for sandwiches, so I wanted it large to be able to slice it thin and use in a nice ciabatta bread.
Ingredient Quantity(g) % of Meat+Fat Pork ham meat 1270 70 Pork belly (70/30 fat/lean) 544 30 Salt 49 2.7 Cure #2 4.54 0.25 Dextrose 9 0.50 White pepper (whole) 5.45 0.3 White pepper (ground) 0.6 0.03 Garlic powder 1 0.06
F-LC starter culture1 0.06
I basically forgot to take pictures of each step, so you should refer back to any of the other salami, such as the latest one : Salame di Sant'Olcese.
I ground the meat using the large kitchenaid grinder plate, which is 3/16". I used the same method as the other salami I've previously made: cube meat, cube belly, mix with spices, chill way down, grind, then add starter culture diluted in distilled water, and mix until a good bind is formed. This is the spice mix I used in the salame. Nothing too exciting, just looking for a nice porky, tasty salame.
 This is the mixture cased. It's a 100mm collagen casing. It's huge, and this "chub" held all of the mixture; 4 lbs of meat! Packed it in as tightly as possible, but I could tell this was going to be a challenge to get in there without air pockets.
 Just like for other salami such as the Chorizo, this one was sprayed with M-EK-4 mold. It was incubated for 72 hours at 70 deg. F. I incubated about 24 hrs longer than other salami because of it's size.
This picture shows the salame after 24hrs in the fermentation box.
Nice mold!
It was then put into the curing chamber at 54 deg. F and 70-75% RH.
It was at 70% at the beginning, then I raised it to about 75% to try and slow the drying. Here is the salame, cured and ready to eat. It cured just about 2 months, and lost 38.7% of it's weight. It could easily have gone longer, but I wanted a salame that's pretty soft, it makes for better sandwiches since it feels moister.
 Here is the salame sliced. It's got a great texture, and fat distribution, but you can see exactly what I was concerned about above regarding the pockets of air. You can see them in the picture pretty clearly. This is a concern because it can cause problems in the aging, oxidation on the inside and potentially spoilage.
Fortunately there was no spoilage, just some oxidation flavor, so i'm still going to eat it. The oxidation is, luckily, limited and the flavor isn't impacted much at all, especially if you eat this with a nice piece of bread. Just another picture from a little further away. I figured you can't have too many pictures of cured meats.
Overall i really like this. It's REALLY convenient for sandwiches, the taste is great, just porky and meaty. It has a nice flavor without it being tangy. I'm really liking this lower temperature, slower fermentation. It could probably use more pepper, and a little more garlic, and I also realized i forgot to add wine. Oops!
As far as the air pockets, I think next time i'll grind the meat finer. It seems that the larger cased salami always have a finer texture. I'll also mix it more and try to get a better bind. Other than that, i'm not sure what else I could do. I tried to be careful when casing it, and packed it in as I went, but i guess I didn't do a very good job at it!
So, overall this salame is a winner. Good flavor, good texture, needs a little more pepper, a solid B.
Monday, February 9, 2009
Salame di Sant'Olcese
 I didn't know much about the salame from Sant'Olcese until i read about it in an Italian cured meats blog. Sant'Olcese is a small town outside Genova. This salame is characterized by a 50/50 mix of beef and pork for the lean portion, and pork fat. It is also traditionally very lightly smoked. Unfortunately I don't have the ability to smoke the salame, so mine will be a Sant'Olcese style salame. This is true for all my salami. None of them can be the real thing, since that requires me to actually be there. They are all "in the style of" the place or region. Anyhow, let's get to the recipe and method.
Ingredient Quantity(g) % of Meat+Fat Pork ham meat 908 37.75 Beef chuck meat 908 37.75 Pork belly (70/30 fat/lean) 590 24.5 Salt 65 2.7 Cure #2 6 0.25 Dextrose 12 0.50 Black pepper (whole) 6 0.25 Black pepper (ground) 2.4 0.1 Garlic powder 2.4 0.1
F-LC starter culture1 0.042
You'll recognize a number of the pictures from the chorizo post. I didn't see a point of taking different pictures for the exact same step. I'm reposting them in case people end up in this post through a link from somewhere, so they can see the whole process. The usual suspect. A ham steak. This is cubed up nicely.
 Pork belly strips waiting to be cubed up as the fat component of the salame. Hmmmm pork belly.......
 This shows the beef chuck, which was also cubed, the ham meat, and the pork belly. I forgot to take a picture of the piece of beef chuck, but i think you might have seen one before at a grocery! Buy one, remove fat and sinew and cube it up.
This is mixed with the cure and spices shown below, and put in a freezer to get nice and firm for 45 minutes or so. This is the spice mixtures and cure that went into the salame. It's very simple. Not a lot of flavors to get in the way of porky beefyness.
 The meat was ground on the large kitchen aid plate. Which i think is 1/4"...i don't recall, and i keep forgetting to measure it. I don't know what is wrong with this picture, i couldn't get the white balance on the camera right, and the picture looks blue...anyhow...the meats and fat are ground.
 The starter culture was diluted with about 30g of distilled water, and the poured over the ground meat mixture.
The mixture is then mixed for about 2 minutes with the Kitchen Aid or about 3-4 minutes by hand until a nice bind is achieved. I forgot to take a picture of the mixed product. Sorry.The salame was cased into 3 natural casings, and 1 collagen 60mm casing. I figured I'd take the opportunity to to a scientific taste test of salame cured in natural casings and one cured in artificial. Will it make a difference? I don't know! We'll see. I must admit, using the artificial ones is MUCH more convenient. They are shelf stable, even, don't smell, don't require washing, but they do lose the natural appeal and old world look. The M-EK4 mold mold is mixed with 30 or so grams of distilled water and allowed to bloom for a couple of hours.
 The mold "concentrate" is then diluted with about 300g of distilled water in a spray bottle.
The salami were placed in the fermentation box at 70 deg. F. for 48 hours. I was actually able to keep my basement room right around 70 or 71 F, no need to run the lightbulb in the fermentation box. After the 48 hours, the salami had a nice coating of mold already.
The salami were fermented for 48 hours, and then put into the curing chamber at 54 deg. F and about 70% RH.
Looking forward to trying them in about a month or so.
Thursday, January 29, 2009
Spanish Chorizo
 I'm an equal opportunity cured meat eater. The product doesn't have to be Italian, it just has to taste GOOD. Case in point, Spanish Chorizo. Chorizo is a salame like cured product redolent of smoked paprika, garlic and oregano. This is the 1st time I've made it, and since it isn't ready yet, I won't know if this formula is any good until I try it. Try at your own risk!
Ingredient Quantity(g) % of Meat+Fat Pork ham meat 998 69.8 Pork belly (about 75/25 fat/lean) 431 30.1 Salt 40 2.8 Cure #2 3.43 0.24 Dextrose 2.86 0.2 Sugar 2.86 0.2 Black pepper (ground) 8.58 0.6 Smoked paprika (sweet) 28.6 2 Oregano (dry) 2.86 0.2 F-LC starter culture 0.5 0.035 Cayenne pepper 1.4 0.1 Garlic (fresh) 12 0.9  I started with my usual ham steak. As I've said previously, I prefer the ham steak to the shoulder/boston butt because there is less sinew and intramuscular fat that has to be trimmed out.
 The ham steak was cubed up into about 1" cubes
 For the fat component I used pork belly. I tried to choose pieces that were particularly fatty. I'd say they were about 70-80:20 fat to lean.
 The belly is cubed up and combined with the ham cubes.
 The spice mixture is carefully mixed to get good distribution of everything, and the garlic cloves are mashed through a garlic pressed, in preparation to be put into the meat.
 I mixed the spice mixture and the crushed garlic into the meat and fat cubes and massaged it for a while to make sure everything was nice and evenly mixed together.
The mixture then goes to the freezer to get really cold before grinding. I let the meat get to at least 33 or 34 deg. F, before grinding. I ground the meat and fat through the large Kitchenaid plate, which if i remember correctly is 1/4". Since i kept everything cold, the fat and meat are nice and distinct.
 The starter culture was mixed with a pinch of dextrose and a splash of distilled water, and let stand for 15 or so minutes to allow the bacteria to wake up, and then poured over the meat.
 I mixed the meat with the Kitchenaid paddle attachment for about 1.5 minutes on low speed. This is done to make sure everything is mixed together, the starter culture is dispersed, and to allow the proteins to form a good bind.
Don't mix too much or you'll smear the fat...not good...not good at all. You want the fat to stay in distinct blobs.I stuffed the chorizo into 1 43mm collagen round casing, and 2 60mm natural beef middle casings. As usual, I tried to avoid any air pockets in the meat mixture by massaging it meat once it was cased, and popping and pricking the casing where there were air pockets on the surface. Earlier that afternoon i had mixed up about 1.5g of M-EK-4 mold with about 30g of distilled water.
This was left for about 3-4 hours to "bloom". I then diluted that mold mixture with an additional 300g of distilled water in a spray bottle. Shook it up real well, and let it sit another 15-30 minutes. (Really i don't know if these sitting periods are necessary..but i guess they can't really hurt).
 The salami were sprayed and put into the fermentation box at 70 deg F. for 48 hours.
They were sprayed again with the mold 12 hours after being put into the box. The lid on the box was closed for the whole 48 hours to keep it nice and humid. As you can see on the left, the mold after 48 hours was already developing very nicely. Here are the chorizos and a few other salami i made that day (write up coming soon) in the curing chamber.
The chamber is set at 54 deg F. and 70% RH.
I expect the 43mm chorizo to be ready in about 2 weeks, and the larger ones in about a month. Looking forward to trying something new!
Wednesday, May 21, 2008
Salame al Barolo
 While making the salame tipo varzi I also made a salame al Barolo. I actually didn't use Barolo, I used a Cote du Rhone. Basically it is a simple salame mixture to which a relatively large quantity of wine is added. The alcohol and excess water evaporate leaving behind the flavors of the wine used. Since I've never tried this before, I figured I'd give it a shot. Unfortunately things didn't turn out quite as rosy as one might hope.
I'm not going to go into the detail that i've given in the past since I don't think there is much point in repeating stuff. Just know that the method is the same; grind, add seasoning, mix, case, spray with mold, ferment, and then dry.Ingredient Quantity(g) % of Meat+Fat Pork ham meat 750 75% Fat back 250 25% Salt 27 2.7% Black Pepper (cracked) 2.5 0.25% Cure #2 2.5 0.25% Dextrose 5 0.5% F-LC Starter 0.4 0.04% Red wine (Cote du Rhone) 250 25%
Everything was ground and mixed, cased into natural beef middles, and sprayed with a solution (1.5g mold to 27g water) of M-EK-4 mold culture. It was fermented at 71-72 deg. F for 48 hours.
As you might immagine the mixture was quite wet after mixing in the wine which made for easy casing.
The salame was dried at about 54 deg. F / 70% RH for about 28 days, until it had lost 45% of its weight. To the left here is a picture of the finished product, and where I can convey an important lesson.
You can clearly see a fairly sizable "air pocket" that somehow made it's way into the mix. Either there was an bubble in the mix that got pushed into the casing, or the wet mixture left air pockets upon evaporating. I'm not sure.
The problem with this is that it can allow bacteria to grow that could be dangerous. This is something that really needs to be avoided by making sure the mixture is properly compacted and massaged into the casings to force any air pockets out of the mix.
The flavor of the salame while first tasting it was OK. Too winey for my tastes, and just not very exciting. Interestingly, after about a month in the fridge, and retasting, it tasted not so great. It had a very oxidized flavor, which i think might have been caused by the air pockets..but I'm not sure. Either way, it was disposed of.
Friday, September 21, 2007
Farmer pork Vs. Commercial pork - Cacciatorino
 There are a number of reasons people choose to buy farmer raised pork instead of commercially farmed pork, but for me, the most important is the flavor difference. Eating a farmer raised heirloom pork chop makes you wonder what you've been eating all these years. It is much juicier, and "meatier" tasting, really night and day. The image to the right shows both types. Right is farmer, left is Costco.
So, I've been wondering if that difference would be appreciable in a salame. It would only make sense that it would be. In order to test this theory I made a very simple salame keeping everything the same except the meat used. For commercial pork I used pork shoulders from Costco, which generally has good meat. The farmer pork was raised by a local farm here in Georgia.
To really taste the difference between the two porks, I decided to make a super simple salame. I would call this a cacciatorino even though it isn't of the appropriate shape for that name. It is made only of meat, fat, salt, pepper, and garlic infused wine (and starter culture and dextrose). The formula I used is as follows. The quantities are for the farmer salami I made, but using the % you can scale as you need.Ingredient Quantity(g) % of Meat+Fat Pork Shoulder 810 70% Fat(belly) 342 30% Salt 31.2 2.72% Black Pepper 3 0.26% Cure #2 2.8 0.24% Dextrose 5.6 0.5% F-RM-52 Starter 1 0.09% Reduced wine 36 3.13%  This time I used a pork shoulder. This one pictured on the left is the one from a Berkshire pig from a local farmer, below that is the Costco shoulder (and their total mangling of it to remove the bone).As you can see the marbling is much greater than in a commercial shoulder.
As usual, this was trimmed, and cubed, removing as much sinew as possible. I quickly realized that using pieces from the back leg, the ham, is much more efficient. It has less sinew, and the yield is much higher. With this bone in farmer piece my yield of trimmed, ready to grind eat, was low. I only got 45% usable meat. The Costco yielded about 60%.
 I used pork belly again. It is really much more convenient than harvesting fatback from the skin portions I buy at the market. If there are large portions of meat in the belly, I remove them.
 Using the formula above, I mixed my meat and fat cubes, and put them in the freezer for about 1 hour.
 I ground using the 1/4" plate. You can see in the picture that partially freezing the meat and fat will give you nice definition in the chunks of fat and meat. If you don't, there is a chance that the fat will smear, and you won't end up with nice fat globules.
I mixed this on the lowest speed on the Kitchenaid mixer for 1 minute. Added everything except the starter culture. I mixed the meat and spices for about 1.5 minutes. (see finocchietto recipe for reduced wine/garlic info). Then added the starter culture which had been dissolved in 30g of distilled water 10 minutes prior. I mixed for another 30-45 seconds. This is what the meat paste should look like when the mixing is done. A good bind has been achieved. You can see the white film on the sides of the bowl which is the myosin protein which has been pulled out of the meat by the salt (correct me if I'm wrong, chemists!)
 The salami were stuffed into 4 43mm casings and 1 60mm casing. All the farmer pork fit into 2 43mm casings.
They were fermented at 83 deg. F for 26 hours for the 43mm, and 28 hours for the 60mm.
They were then put into the curing chamber held at 54 deg.F and 70% RH.
I'm trying a little higher RH than I have in the past to try to slow down the drying to develop more flavor.
The Kichenaid mixer is great for mixing small quantities for salame paste, pretty much what I made with the finocchietto, that is about 1 KG of meat/fat is the max it can handle. If you have more, as I did when making the Costco pork salame, you'll need to grind into a large bowl, and mix everything with a cutting and folding motion with your hands or a spatula. I'm demonstrating this in the movie below.
Looking forward to tasting these head to head. I'll report on them as soon as I can as usual!
Monday, August 27, 2007
Salame al Finocchietto

Salame al finochietto translates to "salame with wild fennel seeds", which is exactly what I made last week. I was actually able to make this during the week by doing one or two steps every evening after work.
I wanted to make a simple salame to get back into the hang of things. This one is about as simple as it gets.
The meat and fat I used were not the usual parts of the pig. Normally I'd use pork shoulder, and fat back. This time I used ham meat and pork belly. It was really nice not to have to do much trimming of sinew from the shoulder, these were basically clean hunks of meat. Very convenient. The belly I used was only slightly meaty, as you'll see in the pictures. It is probably much easier for people get get pork belly, than fat back (unsalted), so let's see how it works out.
Unfortunately, because of the whole curing issue, I will not have a report on the flavors, texture and aromas for about 3-4 weeks. The picture above is of the salame before drying. So for now I'll give you the recipe and procedure I used.
One important note is that everything that touches the meat (grinder, stuffer, bowls, counters, hands etc.) should be very very clean. Remember you're not cooking this meat, and you're holding it at temperatures which would allow bacterial multiplication.
Salame al Finocchietto
900g ham meat
380g fatty pork belly
35g salt
6.5g fennel seed - crushed in mortar and pestle
6.5g dextrose
3.1g cure #2
3.5g coarsely ground black pepper
35g reduced wine (see below)
1g (about 1/4 tsp) F-RM-52 starter culture mixed in 30g distilled water with a pinch of dextrose These are the nice pieces of pork ham meat. You can see they are rather lean, and free of connective tissue. Less trimming and waste for us!
 The meat is cubed into approximately 1/2-3/4" cubes.
 Here is our nice pork ham cubed up and ready for the grinder right after we add.......
 The pork belly! You can see this belly is quite fatty. In fact, the leaner part on the right side of the picture attached to the lower portion, I removed and saved to braise. I used the fattiest portions of the pieces I had. Be sure not to use the pork skin!
 Again, I cut them into about 1/2-3/4" batons or cubes.
 I combined and mixed the meat and belly and spread on a cookie sheet and put it in the freezer for 1-2 hours to get really cold, almost frozen. The surface should be a little "crunchy" from being frozen. You don't want it frozen solid or you won't be able to grind it.
 I ground the meat using the 1/4" plate on the Kitchenaid grinder, and let it drop into the Kitchenaid bowl, then put it back in the freezer to chill again. (Don't leave it in there for longer than 1 hour or so)
 In the mean time, I boiled 2 cloves of lightly smashed garlic in 1 cup of wine for about 10 minutes. It reduced to about 3/4 of a cup. I do this because when I used straight wine, without reducing, I could taste the alcohol in the salame. Boiling it evaporates the alcohol but retains the flavors of the wine.
During this time, I added the starter culture to 30-40g of room temperature distilled water in which I dissolved a pinch of dextrose. This is to wake those little buggers up!
I added everything to the ground meat except the starter culture, and using the paddle attachment (you could use your hands) I mixed the mixture. I paddled for 1 minute. I then added the starter culture/distilled water, and paddled for another 30-45 seconds to get a good bind. The meat paste should become tacky, but don't paddle so much that the meat and fat start smearing. You really want the fat globules to stay distinct. Of course I forgot to take a picture of the meat paste before stuffing. Next time. For stuffing I used 43mm collagen rounds. This is an artificial casing which is soaked in warm water for about 15-20 minutes to soften. Stuff them until they are nicely full, but not super packed or they may burst. Try to stuff them with as few air pockets as possible. Tie them off into loops, and using a CLEAN toothpick poke the casing all over, trying to target any air pockets you may have.
 From this batch I got almost exactly 2 full 43mm casings, one weighing 566g and one 596g. I had a little left over.
I matured them in my incubation chamber at 82 deg. F for 25 hours. This is based on experience. You might want to measure the meat past pH using pH papers.
This is what they look like after incubation. They are just a little more red, and have become a little "tighter" or "stiffer".
Now they get put into the curing chamber until they've lost about 30-40% of their weight. Which is why it is important that you measure the before-cure weight. This should take about 3-4 weeks.
As soon as I taste them I'll report on the taste as soon as I can!
Any questions or comments? Just ask away..let me know if you want even more detail or anything else.
Subscribe to:
Posts (Atom)